Your product photography isn’t just decoration—it’s the digital equivalent of placing your products directly into your customers’ hands. In the absence of physical interaction, images become the primary sensory experience for online shoppers. A single compelling photo can transform a casual browser into a committed buyer, while poor visuals can destroy trust in seconds.
The statistics tell a powerful story. Shopify stores with professional product photography see conversion rate increases of up to 30%. That’s not just a minor improvement—it’s often the difference between profitability and struggle. What’s more, 93% of consumers consider visual appearance to be the decisive factor in their purchasing decisions.
The Impact of Product Photography on Conversion Rates
The connection between image quality and sales isn’t merely theoretical—it’s measurable. When shoppers can clearly see what they’re buying, they’re significantly more likely to complete their purchase. High-quality visuals reduce uncertainty, answer unspoken questions, and create the confidence needed to click “buy now.”
But the benefits extend beyond the initial sale. Accurate product photography sets proper expectations, dramatically reducing return rates. One study found that Shopify stores that invested in comprehensive product photography experienced return rate reductions of up to 25%—a direct impact on both customer satisfaction and your bottom line.
Consider the contrasting experiences of two Shopify merchants selling similar products. The first uses hastily captured smartphone photos with inconsistent lighting. The second invests in professional-quality images that showcase products from multiple angles with consistent lighting and styling. The second store doesn’t just look more professional—it consistently converts at rates 2-3 times higher than the first.
Unique Challenges and Opportunities for Shopify Store Owners
The Shopify platform presents specific considerations for visual merchandising that differ from other e-commerce environments. Your chosen theme determines image display sizes, cropping behavior, and zoom functionality—technical factors that directly impact how your carefully crafted photos appear to customers.
Mobile responsiveness adds another layer of complexity. With over 70% of Shopify traffic coming from mobile devices, your product images must remain compelling when compressed onto a 5-inch screen. This isn’t just about technical optimization—it requires strategic choices about composition, detail emphasis, and visual hierarchy.
The good news? These challenges create opportunity. In the crowded Shopify ecosystem, exceptional product photography provides immediate visual differentiation. While your competitors rely on manufacturer-supplied images or amateur photography, your investment in visual excellence creates an immediate perception of quality and attention to detail that extends to your products themselves.
Foundations of Effective Shopify Product Photography
Great product photography doesn’t require a professional studio or five-figure camera equipment. Instead, it demands understanding the fundamental principles that separate amateur snapshots from compelling product visuals. Let’s break down the essential components you’ll need to create images that sell.
Essential Equipment and Setup
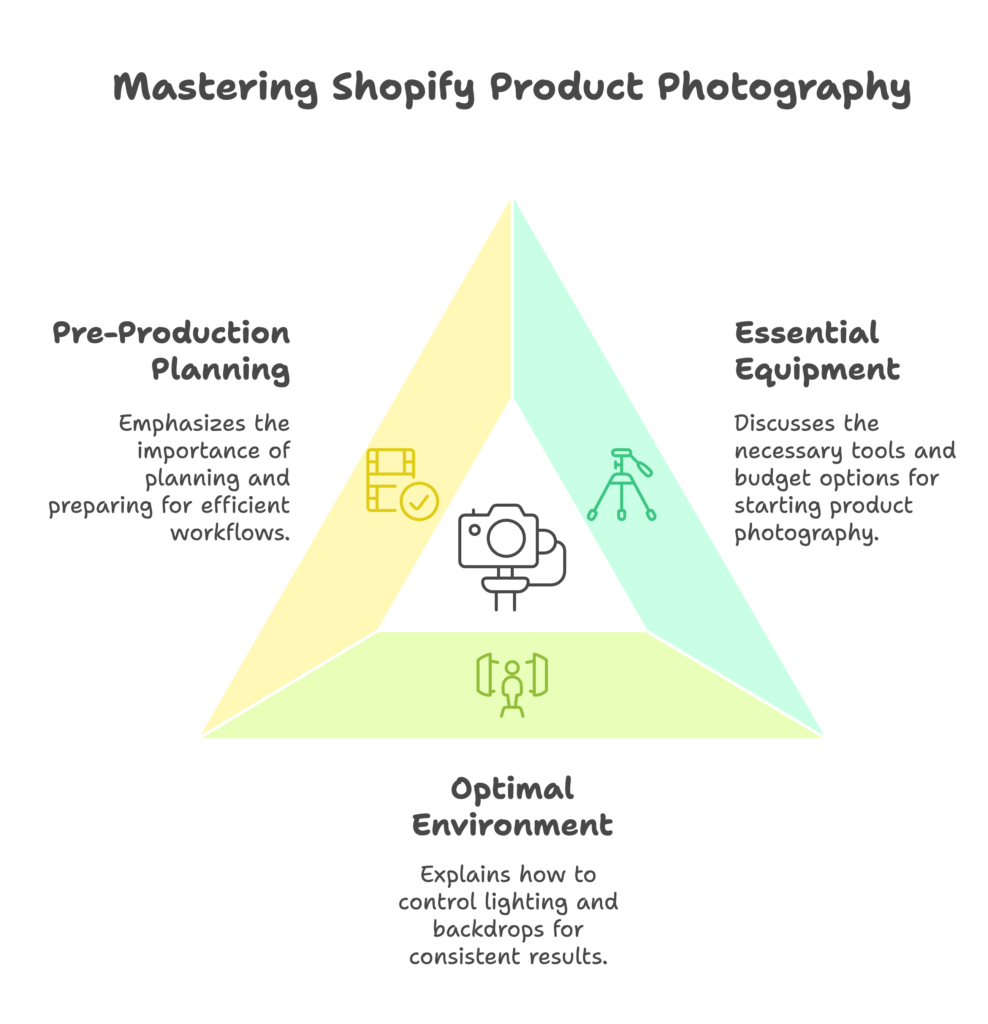
The camera debate often dominates discussions about product photography, but here’s the reality: your existing equipment is probably sufficient to get started. Modern smartphones can capture remarkable product images when used correctly. The iPhone 15 Pro, Google Pixel 8, and Samsung Galaxy S24 all feature camera systems capable of professional-quality results in controlled environments.
If you’re ready to invest in dedicated equipment, consider these options for different budget levels:
- Entry-level ($500-800): A basic DSLR or mirrorless camera like the Canon EOS Rebel T8i or Nikon Z50 with a standard kit lens provides significantly more control than a smartphone.
- Mid-range ($1,000-1,500): Cameras like the Sony Alpha a6400 or Fujifilm X-T30 II offer superior image quality and more professional features.
- Professional ($2,000+): Full-frame cameras like the Canon EOS R6 or Sony A7 IV deliver exceptional image quality for demanding product categories like jewelry or luxury goods.
However, your camera is just one piece of the puzzle. Two accessories make a bigger difference than upgrading your camera body: a solid tripod and proper lighting. A stable tripod eliminates camera shake, allowing for sharper images and consistent framing across product variations. For tabletop product photography, even a $75-100 tripod makes a dramatic difference in image quality and workflow efficiency.
Lighting equipment presents more varied options. At minimum, you’ll need:
- Two softbox lights for consistent, diffused illumination ($100-200 for a basic set)
- A set of white and black foam core boards for reflection control ($20 at any craft store)
- A seamless white backdrop for clean product isolation ($15-50 depending on size and material)
This basic setup creates the controlled environment necessary for professional results, regardless of your camera choice. Remember: great lighting with an average camera produces better results than poor lighting with an expensive camera.
Creating the Optimal Photography Environment
Light forms the foundation of photography, and controlling it is your primary challenge. Natural light offers beautiful illumination when properly harnessed, but introduces inconsistency as cloud cover, time of day, and seasonal changes affect color temperature and intensity. If you choose this route, set up near a large north-facing window (in the Northern hemisphere) for diffused light that doesn’t create harsh shadows, and use white foam core to bounce light back onto shadowed areas of your product.
For most Shopify businesses, artificial lighting provides the consistency needed for product lines photographed over time. Position two softbox lights at 45-degree angles to your product, creating even illumination without distracting shadows. This classic “three-quarter lighting” setup reveals texture and dimension while minimizing problematic reflections on shiny surfaces.
Your backdrop choice significantly impacts the final result. While lifestyle contexts sometimes make sense, most Shopify stores benefit from consistent white background photography that focuses attention entirely on the product. Creating an infinity curve (where the background transitions seamlessly from horizontal to vertical without a visible edge) is simpler than it sounds: tape white craft paper to a wall, letting it fall naturally onto your shooting surface, then smooth the transition between wall and table.
Common environment problems to watch for include:
- Unwanted reflections in glossy products (control these with black foam core positioned outside the frame)
- Color cast from nearby objects (remove colored items from the shooting area)
- Inconsistent shadows (ensure main light sources remain at consistent positions between shots)
- Background wrinkles or seams (iron fabric backdrops, tape paper smoothly, or fix in post-production)
Pre-Production Planning for Efficient Workflows
The difference between amateur and professional product photography often lies in planning rather than execution. Before your camera comes out, create a comprehensive shot list including:
- Primary hero shots (typically straight-on or at a slight angle)
- Secondary angles (side, back, top, bottom as relevant)
- Detail images highlighting key features (zippers, materials, textures, etc.)
- Scale reference shots (showing product in use or relative to common objects)
- Variant images (different colors, sizes, or configurations)
- Lifestyle or contextual images showing the product in use
Product preparation often separates mediocre results from stunning images. Take time to:
- Remove dust, fingerprints, and smudges with microfiber cloths
- Steam clothing to remove wrinkles
- Polish reflective surfaces
- Check for and remove tags, stickers, or other distractions
- Ensure moving parts function correctly for demonstration shots
For products that don’t naturally stand upright, invisible supports like fishing line, tape, or museum gel can create the illusion of floating or perfect positioning. The key principle: anything that must be added to support your product should either be invisible in-camera or easily removed during editing.
Essential Photography Styles for Shopify Success
Different photography styles serve distinct purposes within your Shopify store. Understanding when and how to employ each approach ensures your visual strategy supports the customer journey from initial interest through confident purchase decision.
White Background Product Photography
White background photography forms the backbone of most successful Shopify stores. These clean, distraction-free images focus attention entirely on your product, allowing customers to clearly see details without competing visual elements. They also create visual consistency across your catalog, contributing to a professional, cohesive shopping experience.
Creating truly white backgrounds (rather than muddy off-white or gray) requires careful lighting and camera settings. Position lights to illuminate your backdrop separately from your product, setting exposure to render the background as pure white without overexposing the product itself. In camera terms, aim for the background to measure 255-255-255 RGB while maintaining proper exposure on the product.
Technical considerations for white background photography include:
- Aperture: Use f/8 to f/11 for most products to ensure adequate depth of field
- ISO: Keep as low as possible (typically 100-200) to minimize noise
- White balance: Set manually using a gray card for color accuracy
- Composition: Center products with adequate breathing room (about 10% padding)
Many Shopify merchants struggle with post-processing white backgrounds. While advanced techniques exist in Photoshop, a simpler approach often works: use the Select Subject tool, refine the edge slightly, then place your selection on a pure white layer. Create a subtle drop shadow (Distance: 3px, Spread: 0%, Size: 10px, Opacity: 20%) to add dimension without creating an artificial floating appearance.
Lifestyle Photography for Context and Emotional Connection
While white background images show what your product looks like, lifestyle photography shows what it feels like to own and use it. These contextual images help customers envision the product in their lives, creating emotional connections that drive purchase decisions.
Effective lifestyle photography begins with understanding your target customer’s environment and aspirations. A luxury watch company might show their timepieces in high-end office settings or exclusive restaurants, while an outdoor brand would feature products in adventure settings aligned with their customers’ interests.
For compelling lifestyle images:
- Use the rule of thirds to create dynamic, engaging compositions
- Include human elements when possible—even a hand holding a product creates immediate scale reference and relatability
- Ensure backgrounds complement rather than compete with your product
- Maintain consistent lighting mood across lifestyle images
- Tell a visual story that reinforces your brand positioning
The most common lifestyle photography mistake is forcing unnatural scenarios. Authenticity matters—staged scenes that feel contrived create disconnect rather than connection. Start with a clear vision of how your product naturally integrates into your customers’ lives, then create images that honestly represent that integration.
Detail and Feature Photography
Detail shots bridge the gap between seeing and touching, allowing customers to examine specific product attributes that might influence their purchase decision. These close-up images address unspoken questions and highlight quality indicators that justify your price point.
For small products or intricate details, macro photography techniques become essential. Options include:
- Dedicated macro lenses (providing 1:1 reproduction or greater)
- Extension tubes (inexpensive adapters that enable closer focusing)
- Close-up filters (simple screw-on solutions for occasional macro work)
When shooting details, focus becomes critical. Use these techniques to ensure maximum sharpness:
- Increase your aperture to f/11 or higher for greater depth of field
- Use focus stacking software for extremely close details (taking multiple images at slightly different focus points, then combining the sharpest parts of each)
- Employ auxiliary lighting to illuminate specific features
- Use manual focus with live view magnification for precise control
The most effective detail shots highlight elements that influence purchase decisions: material quality, craftsmanship, functional features, and texture. Think of these images as answering specific questions: “How does the clasp work?” “What does the fabric feel like?” “How well is this constructed?” Providing visual answers builds confidence and reduces purchase anxiety.
Post-Production Workflow for Shopify-Ready Images
Even perfect in-camera images require post-production to optimize for e-commerce. Establishing an efficient editing workflow ensures consistent results while minimizing time investment across your product catalog.
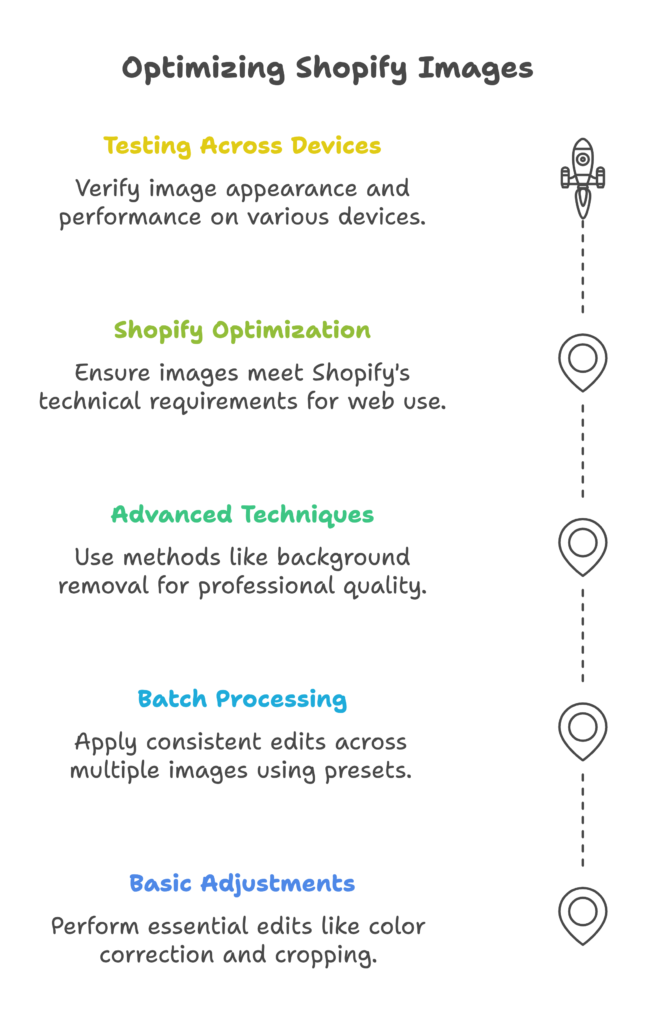
Image Editing Fundamentals
Every product image requires basic adjustments before it’s ready for your Shopify store. Whether using Adobe Photoshop, Lightroom, or alternatives like Affinity Photo, your editing workflow should include:
- Color correction: Adjust white balance to ensure accurate color representation
- Exposure optimization: Fine-tune brightness and contrast for visual clarity
- Straightening and cropping: Align products perfectly and establish consistent framing
- Spot removal: Eliminate dust spots or temporary imperfections
- Sharpening: Apply appropriate sharpening for web display
As your product catalog grows, batch processing becomes essential for efficiency and consistency. Lightroom presets or Photoshop actions allow you to apply identical adjustments across multiple images, ensuring visual cohesion throughout your store. For maximum efficiency, create product-category-specific presets that address the common characteristics of each product type.
Establishing editing templates also streamlines your workflow. Create document templates with your standard dimensions, resolution, and canvas settings to ensure every product image maintains consistent proportions and scale. This seemingly small detail significantly improves the browsing experience as customers move between products.
Advanced Editing Techniques for Professional Results
Beyond basic adjustments, several advanced techniques elevate your product images from good to exceptional:
Background removal creates perfect isolation, particularly for products with complex shapes. While Photoshop’s tools have improved dramatically, achieving clean edges still requires careful technique:
- Use the Object Selection tool as a starting point
- Refine edges manually using the Pen tool for precision
- Pay special attention to transparent or reflective areas
- Add subtle, realistic shadows for dimensional appearance
Retouching requires a delicate balance between enhancement and accuracy. The golden rule: fix temporary imperfections, but never misrepresent permanent product characteristics. Appropriate retouching includes:
- Removing dust, fingerprints, or production marks
- Evening out temporary inconsistencies in fabrics or materials
- Correcting color accuracy when camera limitations affect reproduction
- Enhancing texture visibility for better online representation
Inappropriate retouching—like removing permanent product features or altering colors beyond accuracy—creates false expectations that lead to returns and negative reviews. Remember that your goal is accurate representation that builds trust, not idealized imagery that misleads.
Shopify-Specific Image Optimization
Shopify has specific technical requirements that affect how you prepare your final images. Understanding these parameters ensures optimal display across devices while maintaining fast loading times—a critical factor in conversion rates.
For most Shopify stores, these technical specifications provide the optimal balance between quality and performance:
- File format: JPEG for most products; PNG for images requiring transparency; WebP when theme supports it
- Dimensions: 2048px on the longest side for standard product images (enables zoom functionality)
- Resolution: 72 PPI (higher resolutions provide no benefit for web display)
- Color space: sRGB (standard for web display)
- File size target: Under 500KB per image for optimal loading speed
Export variants for different display contexts to maximize performance. Primary images require full resolution, but thumbnails for collection pages can be optimized at smaller dimensions (800px wide is typically sufficient). This approach improves page load times without sacrificing quality where it matters.
Test your images across devices before finalizing. What looks perfect on your 27-inch monitor might appear differently on mobile devices, where most of your customers will browse. Pay particular attention to brightness (mobile users often browse in varied lighting conditions) and critical details (ensure important product features remain visible at smaller sizes).
Strategic Implementation in Your Shopify Store
Creating great product images is only half the battle—implementing them strategically within your Shopify store determines their effectiveness in driving conversions.
Optimizing Product Page Image Presentation
The sequence and hierarchy of your product images significantly impact customer behavior. Your primary image (the first one customers see) should provide the clearest overall representation of the product, typically a slightly angled front view on a white background. This consistent approach across your store creates a cohesive browsing experience while allowing product variations to be immediately apparent.
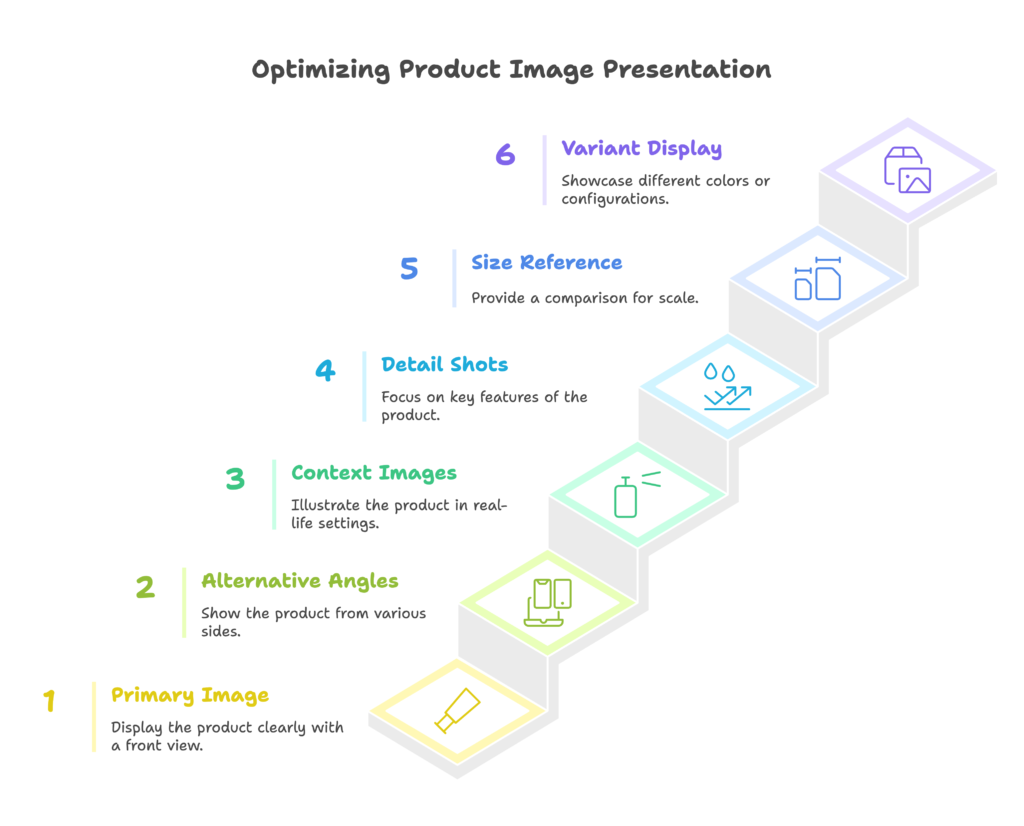
Subsequent images should follow a logical progression that mirrors the customer’s decision-making process. A common effective sequence includes:
- Primary hero image (slightly angled front view)
- Alternative angles (side, back, top as relevant)
- Context/lifestyle images showing the product in use
- Detail shots highlighting key features
- Size reference or scale demonstration
- Additional variants (colors, configurations, etc.)
Don’t overlook image alt text—this isn’t just for SEO, but for accessibility and user experience. Rather than generic descriptions (“blue sweater”), include specific details that help both search engines and visually impaired users understand your product (“Men’s navy merino wool crew neck sweater with ribbed cuffs”).
Leverage Shopify’s built-in image features to enhance the browsing experience. Enable zoom functionality for detailed examination, and consider galleries that allow customers to navigate visually between variants rather than using dropdown selectors. Video thumbnails integrated among still images (showing the product in motion) significantly increase conversion rates for complex or demonstration-worthy products.
Visual Consistency Across Your Store
Consistency creates professionalism. Developing a visual style guide ensures every product image reinforces your brand identity while creating a seamless shopping experience. Your style guide should specify:
- Composition guidelines (camera angle, product positioning, margins)
- Lighting approach (direction, quality, shadow treatment)
- Background treatment (pure white vs. light gray, shadow style)
- Props and context guidelines for lifestyle images
- Color accuracy standards and white balance approach
Apply these consistency principles to collection and category pages, where visual cohesion becomes even more critical. When customers view multiple products simultaneously, inconsistent photography creates a jarring, unprofessional impression. Ensure thumbnails maintain similar composition, scale, and lighting to create a harmonious browsing experience.
Pay particular attention to featured images on your homepage and category pages. These hero images establish expectations for your entire store and should exemplify your highest quality work while clearly communicating your brand’s visual identity. A strategic approach uses these prominent placements to showcase your photography style, drawing customers deeper into your catalog.
Leveraging Advanced Shopify Apps for Enhanced Visual Merchandising
Beyond standard photography, several advanced visual technologies can dramatically improve conversion rates for specific product categories.
360° product views allow customers to rotate products interactively, examining them from every angle. This technology is particularly effective for:
- Products with complex shapes or features on multiple sides
- Items where construction quality is a selling point
- Fashion and accessories where proportions matter
- Products traditionally examined in-person before purchase
Implementing 360° views requires specialized equipment (typically a turntable and consistent lighting setup) and software, but several Shopify apps simplify the process. Sirv, Magic 360, and Arqspin offer varying approaches with different pricing models.
Augmented reality (AR) takes visualization further, allowing customers to place virtual products in their actual environment using their smartphone camera. Furniture, home decor, and larger consumer products benefit most from AR implementation. Shopify’s built-in 3D model support integrates with apps like Shopify AR to create these experiences with relatively minimal technical knowledge.
The investment in these advanced technologies makes sense when:
- Products have a higher price point (typically $100+)
- Purchase decisions depend heavily on spatial understanding
- Return rates due to “not as expected” are high
- Competitors haven’t yet adopted these technologies in your niche
Start with a small test implementation to validate the ROI before expanding across your catalog.
Testing and Optimization Strategies
Even the most carefully crafted product images can be improved through systematic testing and data-driven refinement. Establishing a continuous optimization process ensures your visual strategy evolves with changing customer preferences and competitive landscapes.
A/B Testing Product Images
A/B testing provides concrete data about which images drive more conversions. Setting up effective tests requires isolating specific variables while maintaining sufficient sample sizes to achieve statistical significance.
For meaningful image tests:
- Test only one variable at a time (main image style, background type, angle, etc.)
- Run tests for at least 1-2 weeks or 1,000+ visitor sessions per variation
- Ensure seasonal factors won’t skew results
- Verify that both variations receive comparable traffic quality
The most informative elements to test include:
- Main image style (white background vs. lifestyle context)
- Product angle (straight-on vs. three-quarter view)
- Image sequence (leading with details vs. overall product views)
- Number of images provided (determining the optimal quantity)
- Background style (pure white vs. subtle shadow)
Several Shopify apps facilitate image A/B testing, including Neat A/B Testing and Google Optimize. For quick tests without additional tools, you can temporarily change images on alternating days and compare conversion rates through Shopify Analytics.
Analytics-Driven Image Optimization
Beyond formal A/B testing, your existing analytics contain valuable insights about image effectiveness. Key metrics to monitor include:
- Product page time: Longer viewing times often indicate customers examining images in detail
- Bounce rate: High bounce rates may indicate underwhelming initial imagery
- Add-to-cart rate: The percentage of product page visitors who add items to their cart
- Return rate by product: High returns suggesting a mismatch between images and reality
- Heatmap interactions: Using tools like Hotjar to see which images customers click on most
These metrics can reveal patterns across product categories. For example, you might discover that products with lifestyle images as the main photo have higher bounce rates but better conversion rates among those who remain—suggesting that lifestyle images effectively qualify visitors, attracting fewer but more committed potential customers.
Use these insights to develop category-specific image strategies. What works for apparel might differ from home goods or electronics, and analytics help you identify these distinctions without guesswork.
Customer Feedback Integration
Direct customer feedback provides invaluable insights that analytics alone might miss. Implement these methods to gather specific feedback about your product photography:
- Post-purchase surveys asking “Did the product images provide all the information you needed?”
- Review analysis specifically looking for image-related comments (positive or negative)
- Customer service interaction tracking to identify common visual misunderstandings
- Social media engagement patterns when different image styles are shared
Pay particular attention to what goes unsaid: customers often won’t explicitly mention “the photos were great,” but comments like “product exactly as described” or “looks just like the pictures” indicate successful visual communication.
When negative feedback arises, respond promptly with improved imaging. A customer mentioning “I couldn’t tell how large this was” signals an immediate need for scale reference shots. “Color not as shown” suggests color accuracy issues requiring attention. Treat every piece of visual feedback as an opportunity to prevent future disappointments and returns.
Scaling Your Shopify Photography Strategy
As your product catalog expands, maintaining consistent high-quality photography becomes increasingly challenging. Establishing scalable systems and workflows ensures visual excellence even as your assortment grows.
Efficient Production Systems for Growing Catalogs
Documentation forms the foundation of scalable photography. Create comprehensive guides detailing every aspect of your process:
- Equipment setup diagrams with exact measurements and settings
- Camera settings specified for each product category
- Lighting arrangements with power settings and modifier positions
- Shot list templates for each product type
- Post-production workflows with action steps and presets
This documentation serves multiple purposes: maintaining consistency when you shoot new products, training additional team members, and providing specifications when outsourcing becomes necessary.
As volume increases, batch processing becomes essential. Organize photography sessions by product similarity rather than catalog order—photographing all items requiring the same lighting setup together dramatically increases efficiency. Similarly, batch your editing tasks, completing similar adjustments across multiple products simultaneously.
When considering outsourcing, evaluate these options:
- Hiring dedicated photographers: Brings expertise in-house but requires management and equipment investment
- Local commercial photographers: Provide high quality with hands-on control but at premium prices
- Product photography services: Offer standardized processes at scale with cost efficiency but less customization
- Remote collaboration: Using platforms like Soona for directed remote sessions combines control with efficiency
The best approach often evolves as your catalog grows. Many successful Shopify stores begin with DIY photography, transition to local professionals for key products, then implement hybrid models combining in-house and outsourced production as they scale.
Advanced Equipment and Technique Investments
As your visual strategy matures, targeted equipment investments can dramatically improve both quality and efficiency. Rather than upgrading your entire setup, focus on specific improvements that address your particular challenges:
- Tethered shooting (connecting your camera directly to a computer) enables immediate quality assessment and streamlines workflow
- Automated turntables simplify 360° photography and ensure consistent rotation
- Focus stacking software addresses depth-of-field limitations for detailed product shots
- Color calibration tools ensure perfect color accuracy across devices and over time
- Product-specific lighting modifiers solve challenges for reflective, transparent, or unusually shaped items
Efficiency improvements often deliver better ROI than quality enhancements beyond a certain threshold. For example, a $200 investment in tethering software like Capture One typically saves more money through improved workflow than a $2,000 camera upgrade that marginally improves image quality.
As your team expands, consider specialization rather than generalization. Different skill sets apply to different aspects of product photography:
- Technical photographers excelling at consistent white background work
- Creative directors developing lifestyle concepts and visual storytelling
- Post-production specialists focused on editing efficiency and consistency
- Technical implementers managing the Shopify integration and optimization
This specialization allows team members to develop deep expertise in their particular domain rather than spreading attention across the entire process.
Future-Proofing Your Visual Strategy
E-commerce visualization continues to evolve rapidly, with several emerging trends reshaping customer expectations:
- Video commerce increasingly supplements still photography, particularly for products with moving parts or demonstration value
- User-generated content provides authentic social proof when strategically incorporated alongside professional imagery
- Shoppable video creates interactive experiences directly linking visuals to purchase paths
- AI-enhanced product visualization enables personalization and virtual try-on experiences
Rather than chasing every trend, develop a future-proofing framework that evaluates new technologies against your specific business needs. For each potential visual innovation, assess:
- Relevance to your specific product category and customer base
- Implementation complexity and resource requirements
- Expected longevity versus temporary trend status
- Competitive advantage potential in your specific niche
- Integration capabilities with your existing visual assets
Building adaptable visual assets simplifies future evolution. When creating product photography, capture more content than currently needed—additional angles, higher resolutions, and alternative contexts provide flexibility when new display opportunities emerge. Similarly, organize and archive raw files and editing projects to enable future repurposing as technologies advance.
The most sustainable approach focuses on foundational excellence while maintaining flexibility for strategic innovation. Perfect your core product photography first, then selectively adopt emerging technologies that address specific customer needs or competitive gaps in your market segment.
References
- Adoric Blog. (2024, September 5). Shopify Product Photography: How to Get It Right. https://adoric.com/blog/shopify-product-photography-how-to-get-it-right/
- Bing Digital. (2025, January 3). Best Practices for Shopify Store Product Photography and Visuals: Elevate Your Online Store’s Appeal. https://www.bingdigital.com/best-practices-for-shopify-store-product-photography-and-visuals-elevate-your-online-stores-appeal/
- Orichi. (2024, November 24). The Ultimate Guide to Shopify Product Photography. https://orichi.info/2024/11/24/the-guide-to-shopify-product-photography/
- Shopidevs. (2024, June 14). Expert Tips for Shopify Product Photography. https://shopidevs.com/shopify-product-photography/
- Shopify Blog. (2024). Product Photography: The Ultimate DIY Guide. https://www.shopify.com/blog/product-photography-guide
- Journal of Retailing and Consumer Services. (2024). The Impact of Product Imagery on E-commerce Conversion Rates: A Meta-Analysis.
Ready to boost your Shopify store’s conversions with intelligent, personalized campaigns? Growth Suite is a Shopify app that helps you increase sales through data-driven discount strategies and powerful customer engagement tools. Growth Suite intelligently analyzes customer behavior to deliver perfectly timed discount offers, increasing conversions while protecting your profit margins. The app also includes comprehensive analytics that help you understand exactly what’s working in your store. Install Growth Suite with a single click and start seeing results immediately!
Don’t forget to checkout our other articles;

